Last week, I shared how to display webcam video in desktop and web apps. Based on that, I implemented the barcode reading function using Node.js. In this article, I will share how to build Node.js barcode reader apps for desktop and web with Dynamsoft Barcode Reader SDK.
Binding the C/C++ APIs of Dynamsoft Barcode SDK with JavaScript
Let’s get started with the Node.js barcode C/C++ addon.
The source code is available on https://github.com/Dynamsoft/nodejs-barcode.
To support OpenCV Mat, I created a new API decodeBufferAsync(). The C/C++ code is as follows:
void DecodeBufferAsync(const FunctionCallbackInfo<Value>& args) {
if (!createDBR()) {return;}
Isolate* isolate = Isolate::GetCurrent();
Local<Context> context = isolate->GetCurrentContext();
// get arguments
unsigned char* buffer = (unsigned char*) node::Buffer::Data(args[0]); // file stream
int width = args[1]->Int32Value(context).ToChecked(); // image width
int height = args[2]->Int32Value(context).ToChecked(); // image height
int stride = args[3]->Int32Value(context).ToChecked(); // stride
int iFormat = args[4]->Int32Value(context).ToChecked(); // barcode types
Local<Function> cb = Local<Function>::Cast(args[5]); // javascript callback function
String::Utf8Value templateName(isolate, args[6]); // template name
char *pTemplateName = *templateName;
// initialize BarcodeWorker
BarcodeWorker *worker = new BarcodeWorker;
worker->request.data = worker;
worker->callback.Reset(isolate, cb);
worker->iFormat = iFormat;
worker->pResults = NULL;
worker->buffer = buffer;
worker->width = width;
worker->height = height;
worker->bufferType = RGB_BUFFER;
worker->stride = stride;
if (hasTemplate(pTemplateName)) {
// Load the template.
char szErrorMsg[256];
DBR_InitRuntimeSettingsWithString(hBarcode, pTemplateName, CM_OVERWRITE, szErrorMsg, 256);
worker->useTemplate = true;
}
else {
worker->useTemplate = false;
}
uv_queue_work(uv_default_loop(), &worker->request, (uv_work_cb)DetectionWorking, (uv_after_work_cb)DetectionDone);
}
The first argument is a Node.js buffer pointer. You can call getData() to get byte array from Mat:
const vCap = new cv.VideoCapture(0);
var img = vCap.read();
dbr.decodeBufferAsync(img.getData(), img.cols, img.rows, img.step, barcodeTypes, function (err, msg) {
        results = msg

    }, "");
Note: the build configuration for macOS is a little bit different from the configuration for Linux in binding.gyp file:
'copies': [
                        {
                            'destination': '/usr/local/lib/',
                            'files': [
                                './platforms/macos/libDynamsoftBarcodeReader.dylib'
                            ]
                        }
                    ]
Not like on Linux, the dynamic library file will be copied to the /usr/local/lib/ directory once the build is done. The reason is the RPATH cannot work on macOS. We can use “otool -L dbr.node” to check the dependent library and then get the path /usr/local/lib/libDynamsoftBarcodeReader.dylib.
If you want to keep the library file and dbr.node under the same folder, you can manually change the library path:
cd build/Release
install_name_tool -change /usr/local/lib/libDynamsoftBarcodeReader.dylib @loader_path/libDynamsoftBarcodeReader.dylib dbr.node
I have published the package to https://www.npmjs.com/package/barcode4nodejs. To install the package, you need to have C++ dev tools installed and then run:
npm install -g node-gyp
npm install barcode4nodejs
Building Node.js Barcode Reader for Desktop and Web in 5 Minutes
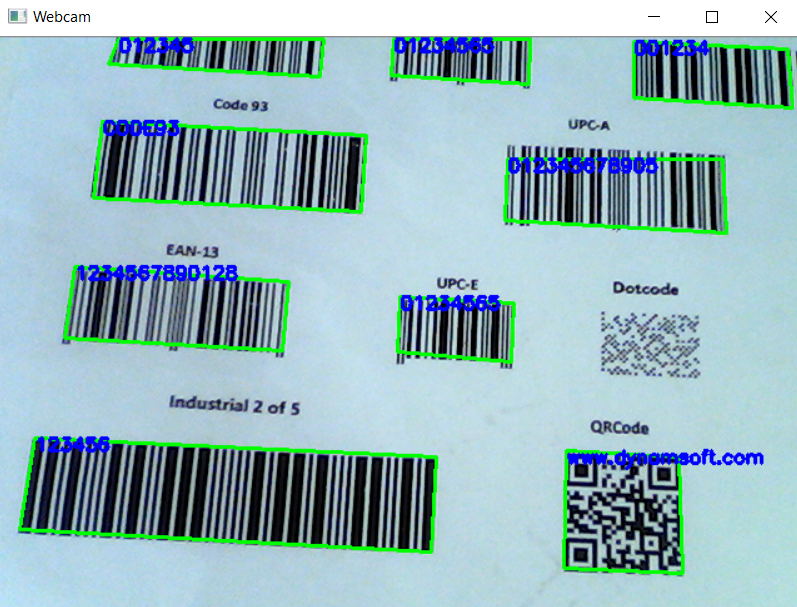
Desktop
Basically, we can use an infinite loop to capture webcam frames and show them in a window:
const cv = require('opencv4nodejs');
const vCap = new cv.VideoCapture(0);
const delay = 10;
while (true) {
  let frame = vCap.read();
  if (frame.empty) {
    vCap.reset();
    frame = vCap.read();
  }

  cv.imshow('OpenCV Node.js', frame);
  const key = cv.waitKey(delay); // Press ESC to quit
  if (key == 27) {break;}
}
However, if we invoke the async barcode decoding function in the loop, the callback function will never return. To make it work, we can use setTimeout() instead:
const dbr = require('barcode4nodejs');
const cv = require('opencv4nodejs');
dbr.initLicense("LICENSE-KEY")
barcodeTypes = dbr.barcodeTypes
const vCap = new cv.VideoCapture(0);
const drawParams = { color: new cv.Vec(0, 255, 0), thickness: 2 }
const fontFace = cv.FONT_HERSHEY_SIMPLEX;
const fontScale = 0.5;
const textColor = new cv.Vec(255, 0, 0);
const thickness = 2;

results = null;

function getframe() {
    let img = vCap.read();


    dbr.decodeBufferAsync(img.getData(), img.cols, img.rows, img.step, barcodeTypes, function (err, msg) {
        results = msg

    }, "", 1);


    cv.imshow('Webcam', img);
    const key = cv.waitKey(10); // Press ESC to quit
    if (key != 27) {
        setTimeout(getframe, 30);
    }

}

getframe()
Because the successive webcam images are similar, it is fine to draw the results on a different frame:
if (results != null) {
        for (index in results) {
            let result = results[index];

            let upperLeft = new cv.Point(result.x1, result.y1)
            let bottomLeft = new cv.Point(result.x2, result.y2)
            let upperRight = new cv.Point(result.x3, result.y3)
            let bottomRight = new cv.Point(result.x4, result.y4)

            img.drawLine(
                upperLeft,
                bottomLeft,
                drawParams
            )
            img.drawLine(
                bottomLeft,
                upperRight,
                drawParams
            )

            img.drawLine(
                upperRight,
                bottomRight,
                drawParams
            )
            img.drawLine(
                bottomRight,
                upperLeft,
                drawParams
            )

            img.putText(result.value, new cv.Point(result.x1, result.y1 + 10), fontFace, fontScale, textColor, thickness);
        }

    }
Web
Copy the barcode detection code to the web.js file:
function capture() {
    var frame = wCap.read()
    if (frame.empty) {
        wCap.reset();
        frame = wCap.read();
    }

    dbr.decodeBufferAsync(frame.getData(), frame.cols, frame.rows, frame.step, barcodeTypes, function (err, msg) {
        // console.log(results)
        results = msg

    }, "", 1);

    if (results != null) {
        for (index in results) {
            let result = results[index];

            let upperLeft = new cv.Point(result.x1, result.y1)
            let bottomLeft = new cv.Point(result.x2, result.y2)
            let upperRight = new cv.Point(result.x3, result.y3)
            let bottomRight = new cv.Point(result.x4, result.y4)

            frame.drawLine(
                upperLeft,
                bottomLeft,
                drawParams
            )
            frame.drawLine(
                bottomLeft,
                upperRight,
                drawParams
            )

            frame.drawLine(
                upperRight,
                bottomRight,
                drawParams
            )
            frame.drawLine(
                bottomRight,
                upperLeft,
                drawParams
            )

            frame.putText(result.value, new cv.Point(result.x1, result.y1 + 10), fontFace, fontScale, textColor, thickness);
        }


    }

    img = cv.imencode('.jpg', frame);
    setTimeout(capture, 30);
}

capture();
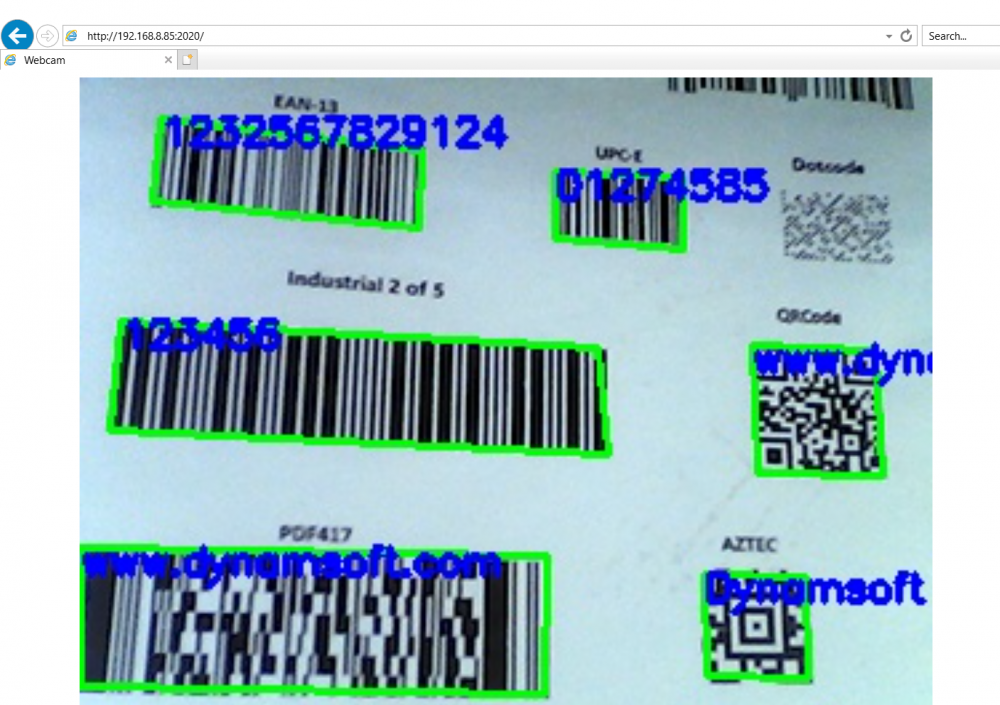
Now we can run the server-side barcode detection. It is totally compatible with any web browser. Here is the screenshot from Microsoft Internet Explorer.
Source Code
https://github.com/yushulx/nodejs-barcode-reader
The post Node.js Barcode Reader for Desktop and Web appeared first on Dynamsoft Developers.